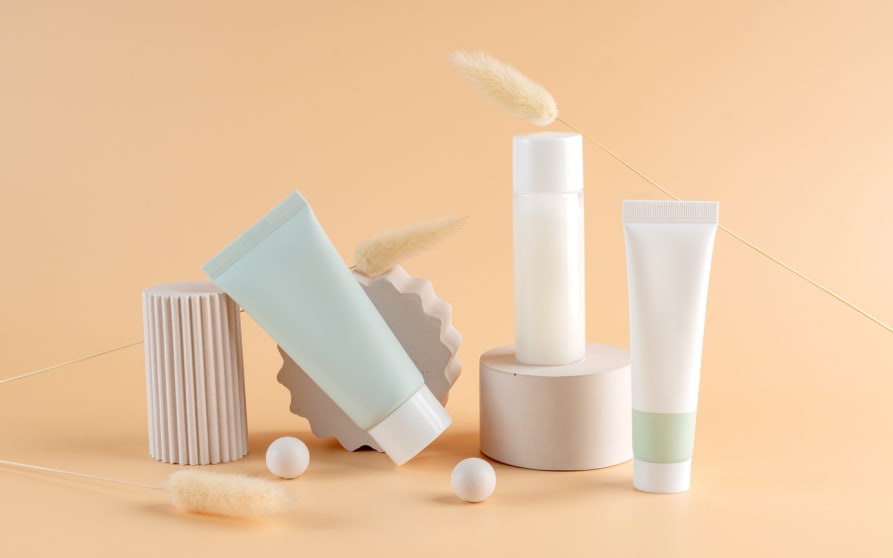
DIY Hygiene: Make Your Bottles and Jars Like New with 3 Simple Steps
In the world of DIY, nothing goes to waste — everything can be given a new lease of life, even your containers. But the success of a homemade skincare product doesn’t depend solely on the quality of the ingredients; it also relies on the impeccable hygiene of the bottles and jars you store it in.
Discover how to disinfect them properly in three simple steps and reuse them safely, while steering clear of common mistakes.
Disinfect your containers in 3 steps
Clean with hot soapy water
Before disinfecting, remove all visible traces of product. Meticulous washing will remove any greasy or sticky deposits that would prevent the alcohol from working effectively. Use hot water and a mild but degreasing soap, such as black soap, which is perfect for dissolving vegetable oil or butter residues. Use a bottle brush or small brush to reach the corners of narrower bottles.
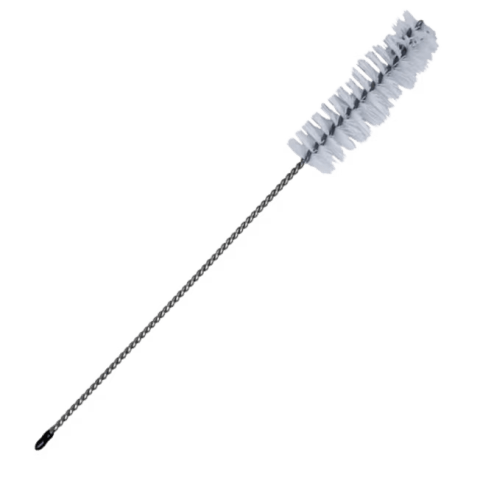
Focus on our Mini Cleaning Brush
This mini bottle brush, with a nylon bristle brush and a metal rod with a protective tip, has been specially designed to make it easy to clean all Aroma-Zone bottles.
Disinfect with alcohol
After cleaning, it's time to disinfect. 90° alcohol is a powerful disinfectant, effectively destroying bacteria, yeast, and mould. Spray generously inside, on the screw thread, cap, and pump. You can also use disinfectant wipes. These areas in direct contact with your skincare products are often overlooked, yet they are a breeding ground for germs.
For small accessories such as pipettes, spoons, or funnels, immerse them in alcohol for a few minutes or wipe them with a cotton pad soaked in alcohol.
Dry and store correctly
Drying is an essential step, as any trace of moisture could compromise your preparations. Ideally, place the containers upside down on a clean cloth or absorbent paper towel. Allow air to circulate for a few hours to completely remove any residual moisture. Then store your disinfected bottles in a dry, dust-free place, ready for your next skincare routine.
Focus on the advantages of making your own homemade cosmetics.
Reusing your DIY bottles: mistakes to avoid
Not checking the condition of the container
Before each new use, be sure to inspect your jars and bottles. Cracks, dull plastic, or malfunctioning pumps are all signs that it's time to replace them. A damaged container can allow air or germs to enter and reduce the shelf life of your homemade cosmetics. Instead, opt for reusable, durable, and safe glass containers.
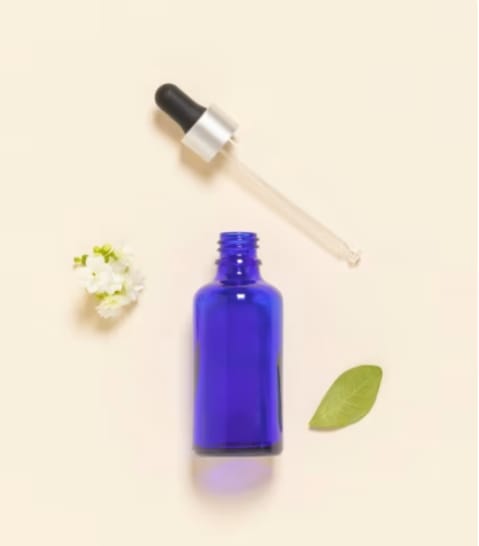
Focus on our DIN18 blue glass dropper bottle, 50 ml
This blue glass bottle with a dropper pipette protects your cosmetic and aromatherapy preparations from light thanks to its colour. It allows for simple and precise drop-by-drop dosing of aqueous and oily liquids. It will therefore be indispensable for making your precious preparations with precision. Its large capacity is ideal for frequent use of your solutions.
Mixing product residues
Pouring a new cream or serum over leftover products is a common but risky mistake. Residues, which are often invisible, can be contaminated and alter the new preparation. You may find that your product changes smell or texture, or does not keep well.
Always use an empty, clean, and dry bottle, taking the time to brush it with a cleaning brush if necessary.
Forgetting to sterilise accessories
Pipettes, measuring spoons, mini whisks, funnels — these tools come into direct contact with your formulations and should be disinfected just as thoroughly as your containers. They’re often overlooked in hygiene routines, yet they can harbour bacteria and mould just as easily.
Keeping your bottles and equipment properly clean helps extend the shelf life of your DIY skincare and ensures you get the very best from each product. With this simple routine, your homemade recipes maintain their quality, and your containers enjoy a new lease of life — practical, economical and eco-friendly.
Spotlight on our editor: Patricia Béard

Patricia Béard has been exploring the properties of plants for over 10 years and is committed to a conscious and planet-friendly lifestyle. As an SEO web editor, her mission is to share the virtues of the plant world through holistic health, natural cosmetics, well-being, and healthy eating.


